The ISP, ETH, USB and SD programming introduced in Chapter 3 are all based on the normal startup of the board. The operation is cumbersome and takes a long time. Therefore, it is only suitable for updating the system during debugging. Actual batches During production, a better way is to burn the entire system image to the flash first, and then paste it onto the board. This method is master production.
Before making the system, you need to confirm that boot/drivers/mstar/spinand/drvSPINAND_api.c has added ENV0 partition compatibility processing:
- Make a master image
First, download SpinandPackBinTool.rar directory to the Linux system and unzip it:

Copy the images directory we compiled to SpinandPackBinTool/ directory:#cp ../images/* ./ -rf
Copy PARTINFO.pni and PINANDINFO.sni:#cp images/boot/PARTINFO.pni images/boot/SPINANDINFO.sni images/
Then modify SPINAND.INI, set the images directory and nandid, and modify env_part to ENV0:#vi SPINAND.INI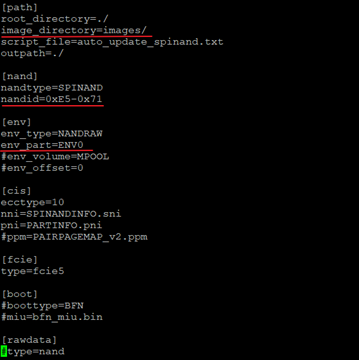
Modify set_partition.es, shield the setenv mtdparts command, and ensure that the size of the ubi partition does not exceed (A00000+A00000+5000000+500000):#vi images/scripts/[[set_partition.es
Execute ./SstarMakeBin to successfully generate nand.bin. This is our master image:#./SstarMakeBin -n SPINAND.INI

- Burn verification
After the master image is made, we get nand.bin. Next, we will burn it to Flash to verify its function. In the actual production, it is burned by a dedicated burner, but in the development stage, you can use estar to burn first (it is also possible to burn with ISP, but it takes up to half an hour to burn once), and then confirm the function. Use the burner to burn.- Use estar to burn
First, you need to open Tftpd32 and point to the directory where nand.bin is located. For the operating steps, refer to Chapter 3 ETH Burning.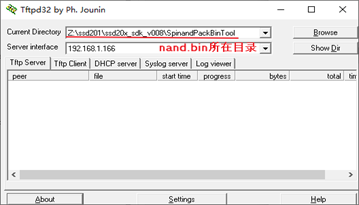
#setenv ipaddr 192.168.1.112
#setenv serverip 192.168.1.166
#saveenv
#tftp 0x21000000 nand.bin
#nand erase.chip
#nand write.e 0x21000000 0x00 ${filesize}
#reset
- Use estar to burn
- Use the burner to burn
Here are the steps to use Dediware to burn Dosilicon’s Flash, other Flash operation steps are similar.
First install and open Dediware: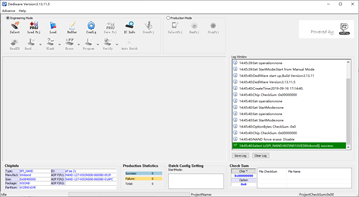
Click Select in the upper left corner to select the corresponding Flash model: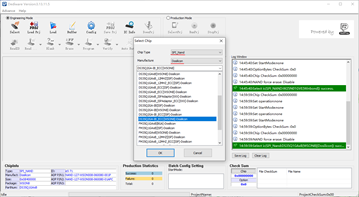
Click Load, select the nand.bin we want to burn: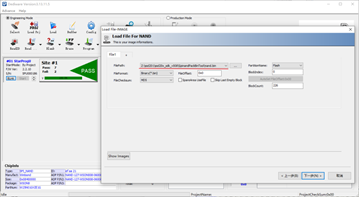
Click Erase, Program and Verify in turn: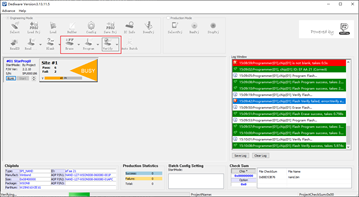
At this point, the image burning is completed, remove the Flash from the burner, paste it on the board, and observe whether it starts normally.
文档更新时间: 2020-11-02 21:21 作者:admin
